|
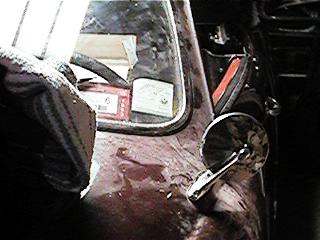
My husband Jeff and I aquired the Ghia in 1992 form
the Original owner. Driven for a short time, we discovered that it needed to have a new floor pan installed and was unsafe
to drive. We had a lot of work ahead of us to get this vehicle fully restored. We've decided to 'go original' and as money
is never plentiful, we are taking it one step at a time, first safety, then glamour!
This car runs GREAT! And, it's a whole lot of
fun getting there too! If It had a top, I'd certainly drive it more often. Even at 41 years old, Mr.
Ghia has been known to fill in when one of our Daily Cars is out of commission.
Jeff's replaced the right and left floor pans, brakes
all around, including master cylinder, clutch, all new tires, the (6v) battery and lots of "general engine stuff".
Sorry, can you tell I am NOT the mechanic? I leave those email questions up to Jeff... we get a lot of
them! Most people ask about parts and where to get them, so I have links to our favorites on this web site.
We get most of what we need from Karmann Ghia Parts and restoration - call for a Catalog/800-927-2787.
We still have a "TO DO someday" checklist,
mostly cosmetic things that need to be done.
- We would love to someday get the top repaired.
Although it is expensive, I would not attempt that job
on our own.
- 2006 Jeff finally bought the kit to replace the carpeting,
original Oatmeal of course. Carpet kits are available and cost approx $200, wasn't "too bad" a project.
- I would love to find a rear bumper in good condition! If
you have one to sell, please email me! .... donations are overwhelmingly appreciated!
- Finally, maybe someday, we will have it painted the original
Henna Red too! Wouldn't that be awesome!
passing along a tidbit of VW tech.
Here is a great technical article by Wolfsburg west about checking the
Starter Electrical circuit and adding a HOT START RELAY (which is something I do with everyone of my VWs)
http://www.wolfsbur gwest.com/ wired/wired_ 03_01/wired_ 03_01.htm
Copyright © Wolfsburg West 2001
Starter Circuit Troubleshooting
First,
let’s look at the heart of the system, the starter.
Starters are a very misunderstood electrical component. Bosch
claims that warranty returns on starters are mistakenly ex-
changed in over 50% of the cases. A starter motor is a
basic
electric motor with a few peculiarities that we should ex-
plain. Mounted to the top of the starter motor is a
small
round cylindrically shaped device known as the solenoid. The
solenoid is an electric gadget that engages the
sliding gear
of the starter into the ring gear of the flywheel, while sup-
plying current to the starter motor at a
precise moment. As
you can see, the solenoid really has two distinct functions,
movement of the drive gear into the
flywheel and to supply
current to the starter motor itself.
HOW CURRENT FLOWS THROUGH THE STARTER CIRCUIT.
Voltage
from the battery is carried to the ignition switch via
a heavy red wire. From the ignition switch, voltage is sent to
the
starter solenoid. The starter solenoid first moves the
starter gear into the flywheel ring gear and secondly applies
current
from the positive battery cable to the starter motor,
thus rotating the flywheel in an effort to start the engine.
One
important concept to remember is that the ignition switch
only supplies current to the solenoid. The solenoid is what
does
all the work, in terms of switching the starter motor on
and off. Starters can demand in excess of 300 amps all of
which
is controlled through the solenoid.
Unique to the VW supplied starter motor is the way the arm-
ature is supported.
Most starter motors support the armature
on both ends with a self-contained bearing/bushing. All Beetle
models with
the exception of those possessing the automatic
stick shift option support the gear side of the starter with
a bushing
located in the transmission housing. Bus models used
this type of configuration through 1971. Critical to proper
operation
of the starter, this bushing is often over looked due
to the difficulty involved with regards to replacement. It is a
good
rule to inspect and or replace this bushing whenever the
engine is removed from the vehicle, and always when replacing
the
starter.
INSPECTING THE STARTING SYSTEM.
Is the battery charged? Turn on the headlights. Are they
bright? If
they appear dim, chances are the battery is weak
and should be charged. If you own a voltmeter you can check the
charge
of the battery. A fully charged 6-volt battery should
have a static voltage of 6.3 volts. At 12.8 volts a 12-volt bat-
tery
is fully charged. Static charge is the voltage across the
battery with all electrical components turned off.
HOW ARE
THE GROUND STRAPS?
Check both battery and transmission to body ground straps. Both
need to be tight and without corrosion.
Often overlooked is the
transmission to body ground strap. This electrical component
grounds the engine and transmission
to the electrical system and
is very important to a functionally sound electrical system.
CLEAN ALL ELECTRICAL CONNECTIONS
IN THE STARTER SYSTEM.
Refer to the diagram of the starter electrical system. Insure
that all connections in the system
are clean and tight. A scotch
bright pad works well for removing any corrosion. Tighten any
loose push-on connecters
by squeezing the ends with pliers.
If the above does not fix the problem, the last step involves
troubleshooting the
electrical circuit. Isolating the starter
from the rest of the circuit is the proper approach. This is
easily accomplished
by shorting the positive battery wire con-
nected to solenoid, which in turn bypasses all other electri-
cal connections.
The positive solenoid wire is easily identi-
fied in that it is connected to the solenoid by means of a
push-on style
connector. Simply take a 6" length of medium gauge
wire and strip both ends. Touch one end to the push-on termi-
nal
located on the solenoid and the other to the positive bat-
tery cable. See diagram. Remember to make sure the car is in
neutral
and the wheels are properly blocked. If the starter
does not crank then replacement will be necessary. If the star-
ter
cranks, there is a problem with the ignition switch and/or
the wiring extending from the switch to the starter.
Quite
often you will go through all of the above steps, includ-
ing replacing the starter only to find that the starting system
functions erratically. Upon further diagnosis you will find that
shorting the battery and solenoid terminals as described
in the
above activates the starter. This is where the use of a hard
start relay comes into place.
HOW A HARD START
RELAY WORKS
The most common problem with the starter circuit in relation to
the starter not cranking can usually be
traced via the wiring.
The circuit consists of a long run that extends from the bat-
tery, which sits in the rear of
the car, to the ignition
switch, located in the front of the car, and back to the star-
ter. Old wires, dirty electrical
connections or a weak ignition
switch can all contribute to the solenoid not receiving ade-
quate current in order to
energize. The hard start relay re-
duces the normal 20-30 amp draw of the solenoid to under 1 amp
eliminating all of
these variables.
At 12.8 volts a 12-volt battery is fully charged. Static charge is the voltage across the battery
with all electrical components turned off. At 13.09 volts, our battery is in tip top shape!
Often overlooked is the transmission
to body ground strap. This electrical
component grounds the motor and
transmission to the electrical system and is
very important to a functionally sound electrical system.
The positive solenoid wire is easily identified in that it is
connected to the solenoid by means of a push-on style connector.
Simply take a 6" length of medium gauge wire and strip
both ends. Touch one end to the push-on terminal located on the solenoid and the other to the positive battery cable.
Here's
an example of a car equipped with a hard-start relay. If one is needed for your car, this is the typical mounting position.
If you click on the link above there is an illustration that demonstrates the routing order of the various wires
that comprise the starter system. This wiring schematic includes the use of a hard start relay. Please refer to the upper
most illustration for an unmodified version.
[Non-text portions of this message have been removed]
|